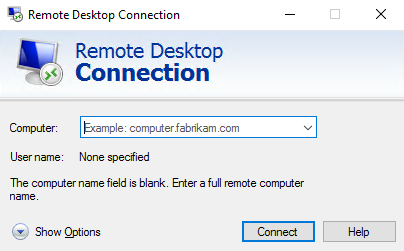
If you always feel annoyed of clicking and accepting an unknown or at least untrusted SLL certificate on a RDP (Remote Desktop Protocol) connection negotiation, you can provide a SSL certificate at this place. This can either be a purchased one for your public domain or just a common, locally-used certificate.
This guide shows how to put your certificate to a Microsoft Windows Server 2016 Standard (Build 14393) RDP connection.
First of all: If you are just hosting an internal Windows server (either physically or on a virtual machine) without having access to the internet, you do not need a certificate at all - assuming you trust yourself and your Firewall. But since you provide your system to be accessible from another public network and others are using your server, you confirm them a secure connection and a secured transaction of their data.
Note: A certificate does neither replace a firewall, a DMZ nor any password policies and access rules - it just guarantees the encryption of data.
Follow these steps to put a certificate to your RDP connection
- Think about a fitting domain name of your server. If the server will be provided to external useres, this is probably your public domain name (e.g. rdp.sbuechler.de) which is usually defined by the DNS name that you can set in your hosting provider management console. If it is provided internally, you can choose an arbitrary domain name (e.g.intern.myTest.de). You can set the domain name of your server in the computer properties.
- Create a certificate by creating it on your own with OpenSSL or let it be issued by a common Certificate Authority (like Let's encrypt, DigiSign, etc.). The Subject of the certificate must be equal to your domain name which you have defined in advance.
- Activate the RD license server: The RD (Remote Desktop) Services license server issues client access licenses (CALs) to users and devices when they access the RD Session Host. You can activate the license server by using the Remote Desktop Licensing Manager [2]
- If not done yet, you have to convert your certificate files into the industrial standard #PKCS12: How to convert certificate *.pem to *.pfx files (coming soon)
- Now you are able to install your converted certificate to the certificate store of your server. Make sure to install it at computer level, not at user level.
- In order to assign the imported certificate to your RDP connection, we first need the thumbprint of your certificate. Get it by executing the following command on your Windows Powershell:
Get-ChildItem "Cert:\LocalMachine\My"
Save it to a temporary text file, we'll need it later. - Now we extend the Path variable:
$PATH = (Get-WmiObject -class "Win32_TSGeneralSetting" -Namespace root\cimv2\terminalservices)
- The final step is to set our new certificate to be the active one of the RDP Listener. Make sure to replace the value of "SSLCertificateSHA1Hash by the value you previously stored in your temporary text file:
Set-WmiInstance -Path $PATH -argument @{SSLCertificateSHA1Hash="thumbprint"} - Done! Your next connection attempt over RDP will no longer prompt you to trust an untrusted or unavailable SSL certificate.
Props go out to Bogdan Lashkov who has figured out this workaround [1].
Sources
[1]: Serverfault.com - how-install-ssl-certificate-for-rds-on-windows-server-2016
Related / Read more


